
Premise
In my previous posts, I had demonstrated how to,
In this post, I’ll show how to add an edit form to PowerApps and then, submit the same to its source. In this case, a SharePoint List.
Edit Forms in PowerApps
Just like a display form, PowerApps also has an edit form. The beauty of this form is that all the controls gets added automatically as per their respective field types. For ex, a textbox will appear for a string field and a choice/drop-down for choice field. It makes creating cross-platform apps very easy. So, let’s check out the steps then,
- Add a new PowerApps Edit Form, from the top menu item bar in PowerApps studio.
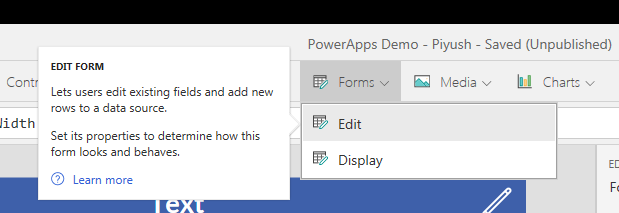
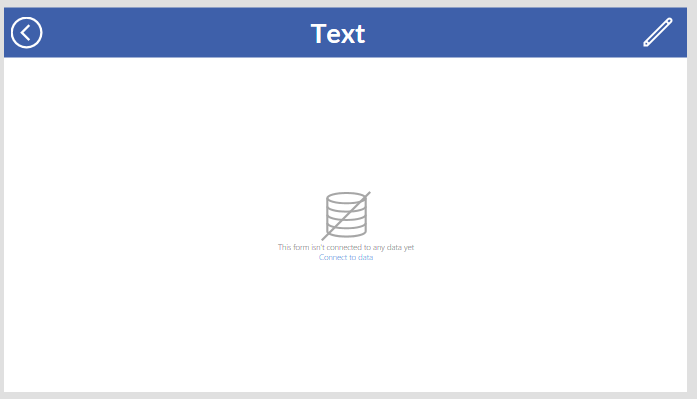
Add Edit Form - An empty form will be added to the form. Below form has been modified to take up the full width and height.
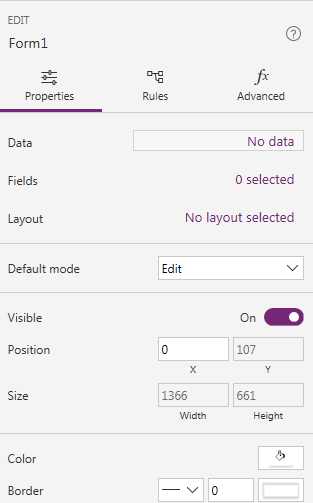
Edit Form - We need to first set the data source of this form. Click on the Data option of the property pane.
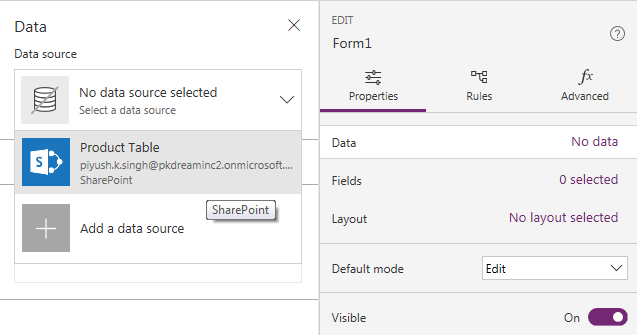
Edit Form Data Source - Add the data source. In this case, SharePoint List. If no data source is configured then, you have to add a data source first.
Add Data Source - The form will now automatically generate all the fields from its source. This feature is really amazing. Without writing any single line of code, PowerApps generate respective input fields automatically based on the given types.

Empty Form - Set the item property of this edit form. In this case, we’re passing the value from a previous screen. Hence, I am using the same here.

Edit Form Item - Let’s add a Save icon now. We’ll use this icon to update the current item value.
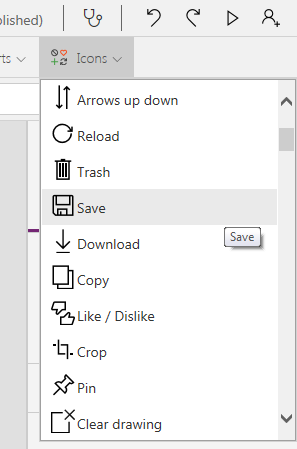
Insert Save Icon 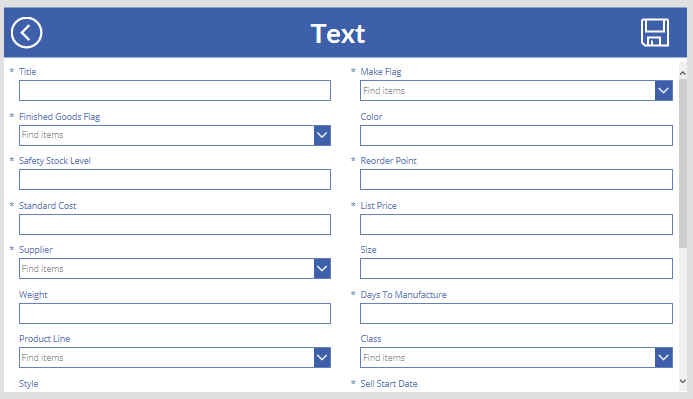
Save Icon - On the OnSelect event of the form, write the following code to update the item.
SubmitForm(Form1)
Form1 is the name of our form. Writing this much code will now ensure that, all our changes will be reflected to the source.

SubmitForm - Now that we have the update code in place, lets also ensure that all our changes are successfully saved. To do this, go to the OnSuccess event of the form and write the following code. This event gets triggered only after the item has been updated successfully.
Notify("Data saved successfully", NotificationType.Success)
OnSuccess - Similarly, add a notification on the OnFailure event for any unexpected failures as well. It gets triggered if, for any reason, the update process fails.
Notify(Form1.Error, NotificationType.Error)

OnFailure
Success message will be displayed when the item gets updated at the source.

For any unexpected error, we can display the error message to the user.

PowerApps create a new item on update
PowerApps uses the Id field to determine whether a request is for creating a new item or updating an existing one. The key here, is to always include the Id field in your request. If we don’t provide this field then, all our request will be considered as a new item request. SharePoint, in that case, will create a new item for each such requests.
Key Takeaways
- Make sure to always provide the unique id for update. Otherwise, a new item will get created.
- Always make use of the, OnSuccess and OnFailure event handlers. Otherwise, we can never say for sure if, the item has been successfully updated.
- PowerApps selects the number of fields, to be added to the form, based on the default Content-Type of the sorce list. If you have more than one Content-Type on the source then, the first visible Content-Type for the new button will be selected by PowerApps. That’s how it populates the form.

i want to edit the existing data and create a new entryin powerapps….but i am not able to do..when ever i update the edit form it is modifiying the existed data in powerapps
LikeLike
helpful
LikeLike
Great but can’t get the Item = selectedItem to work.
LikeLike
You need to create a gallery from the data source where forms are feeding to, and then you need to set arrow to something like this: Navigate(Form1),Transition.None,{selectedItem:ThisItem});
LikeLike
Hi, selectedItem seems to work but my power app keeps saying “getting your data …”.
Anny suggestions?
LikeLike
I am a begineer in Powerapps.
I have 1 edit form and 1 gallery contrrol, form is fetching all the values from sharepoint list.
I need to update the form in powerapps and update the new values back to the sharepoint list for that particular ID.
Plz suggest a way to do this.
Thank You in Advance.
LikeLike
I am a beginner to powerapps
I need to edit the existing data and update the entry in sharepoint list through powerapps….but i am not able to do..when ever i update the edit form it is creating a new entry.
Plz Suggest
LikeLike
This was extremely helpful
LikeLike
How edit form work to pic id behind of SharePoint, can anyone explain or show way to do this with power apps.
LikeLike
It took me months to find this how-to and it was immensely more helpful than everything else that popped up in Microsoft. This was exactly what I needed to complete a simple form to list and I sure wish it popped up in a search engine anywhere earlier.
LikeLike
Hi piyush
Hope you are doing well
I am trying to Create a user input form that should be notified via outlook as a user response details
Created a flow using power app button
But it doesn’t work can u pls help
Or if there’s some different approach to this
LikeLike
selectedItem is not valid in the “Item” field. Your screenshot shows “Item” in a dropdown (which does not exist ) and you can’t use a function. It’s just a text field
LikeLike