This particular job caused quite a bit of trouble. Though, the objective was just to download and install the SharePoint Online Management Shell, the issues arose due to various dependencies. I have tried to list down the various steps involved in this operation below
System Requirements:
- Supported Operating System.
- Windows 7 Service Pack 1,
- Windows 8,
- Windows Server 2008 R2 SP1,
- Windows Server 2008 Service Pack 2,
- Windows Server 2012
- PowerShell 3.0
Update PowerShell from 2.0 to 3.0
If you’re running the PowerShell version < 3.0 then you need to update it to 3.0. You can check the version of the PowerShell by running the following command in the shell.

The ScreenShot above displays a PowerShell of version 3.0. You may get version 2.0 or if you can also get an error message stating, that the variable does not exist then, it is safe to assume that the engine is version 1.0. If your engine is 3.0 or higher you can skip this segment.
Next, download the latest Windows Update from the url, http://www.microsoft.com/en-us/download/details.aspx?id=34595 and install it.
Install Instructions:
To install Windows Management Framework 3.0:
1. Download the correct package for your operating system and architecture.
- Windows 7 Service Pack 1
- 64-bit versions: Windows6.1-KB2506143-x64.msu
- 32-bit versions: Windows6.1-KB2506143-x86.msu
- Windows Server 2008 R2 SP1
- 64-bit versions: Windows6.1-KB2506143-x64.msu
- Windows Server 2008 Service Pack 2
- 64-bit versions: Windows6.0-KB2506146-x64.msu
- 32-bit versions: Windows6.0-KB2506146-x86.msu
2. Close all Windows PowerShell windows.
3. Uninstall any other versions of Windows Management Framework 3.0.
4. Run the MSU file that you downloaded.
For information about troubleshooting the installation, see the Release Notes.
To uninstall Windows Management Framework 3.0:
5. In Control Panel/Programs/Uninstall a program/View installed updates, locate and uninstall the following installed Windows Update:
- KB2506143 – for Windows 7 SP1 and Windows Server 2008 R2 SP1
- KB2506146 – for Windows Server 2008 SP2
SharePoint Online Management Shell
Download and install SharePoint Online Management Shell from the url, http://www.microsoft.com/en-us/download/details.aspx?id=35588
Run the Shell
Open the SharePoint Online Management Shell

And type the command Connect-MsolService and press enter. If everything is fine then, you’ll be shown the following screen

Otherwise, the following error message will be displayed!
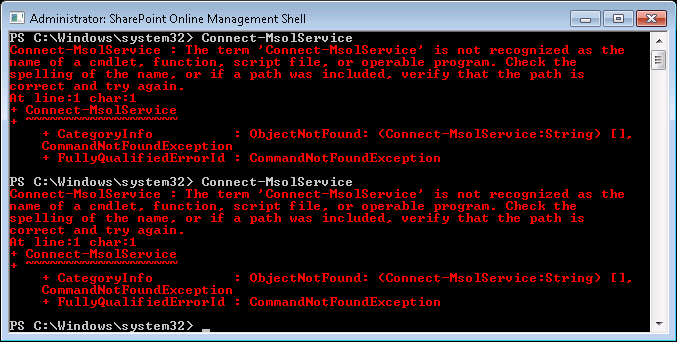
Fix the Issue to run Connect-MsolService, PowerShell command
If you can run the command, Connect-MsolService, then everything is fine and you can skip this step and run your commands successfully.
To successfully run the Connect-MsolService PowerShell command, you need to:
1. Find out what bitness your operating system is (x86 / 32-bit OR x64 / 64-bit). See Microsoft’s “Is my PC running the 32-bit or 64-bit version of Windows?” article for help.
2. If necessary, install the appropriate bitness version of PowerShell 3.0 (which I hope we just did already)
Note 1: Windows6.0 is Windows Vista and Windows6.1 is Windows 7
Note 2: If you get a message of “The update is not applicable to your computer.” during the install then either you downloaded the wrong version of you already have it installed
3. Install the appropriate bitness version of the Microsoft Online Services Sign-In Assistant for IT Professionals
4. Install the appropriate bitness version of the Windows Azure Active Directory Module for Windows PowerShell
Note: If you get an error of “In order to install Windows Azure Active Directory Module for Windows PowerShell, you must have Microsoft Online Services Sign-In Assistant version 7.0 or greater installed on this computer.” and a resulting failed install, install the Microsoft Online Services Sign-In Assistant for IT Professionals BETA (you shouldn’t need to uninstall the normal version but I would recommend it).
5. Run the appropriate bitness version of PowerShell
6. Run the Import-Module MSOnline PowerShell command
7. Finally, run the Connect-MsolService PowerShell command
You should now be able to see the login screen.

Finally, it’s done!!
[Edit]
It has been noted that on some machines, even though the command runs successfully directly from the PowerShell, the same cmdlet throws the “cmdlet not supported” error when trying to execute it from within a C# application. To tackle it:
Copy the folders called MSOnline and MSOnline Extended from
C:\Windows\System32\WindowsPowerShell\v1.0\Modules\
to the folder
C:\Windows\SysWOW64\WindowsPowerShell\v1.0\Modules\
And then in PS run the Import-Module MSOnline, and it will automatically get the modules.

[…] you have, SharePoint Online Management Shell installed on your computer then, you can get the same by running this PowerShell […]
LikeLike